
Welcome! This is an unofficial strategy guide for the iOS/Android game Crash on the Run. It is a work in progress.
Feedback welcome on reddit or the King discussion forum. Note that the developers sometimes make changes without warning, so there may be some innacuracies.
Last updated July 6th 2021 (up to 200 Power Gems).

 Crash is not your typical bandicoot. Years ago he was enhanced by Dr Neo Cortex using an Evolvo Ray then escaped from his clutches. Crash’s sister Coco has a knack for technology, and together they regularly foil Cortex’s evil plans – with help from Aku Aku, a talking witchdoctor’s mask.
In his latest scheme Dr Cortex has been acquiring power gems in order to activate portals throughout the multiverse, with the ultimate aim of enslaving all dimensions through his mutagen henchmen.
Fortunately Coco learned of his plans and is developing special portal weapons to send the henchmen back to their own dimensions, allowing Crash to retrieve the stolen power gems and save the multiverse. All in a day’s work!
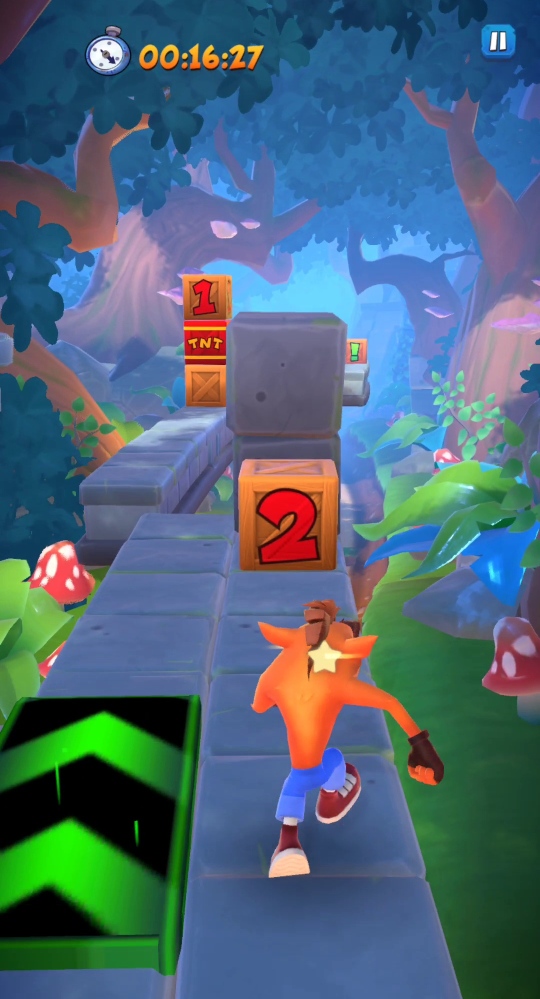
☞ Swipe upwards to jump over an obstacle such as a rock or pit.
☞ Swipe left or right to change lanes. You can do this in the air during a jump.
☞ Swipe downwards to slide under an obstacle with a gap below it. Sliding into an object has the same effect as spinning.
☞ Swipe up then down to perform a body slam (or just swipe down if you are already in the air). This breaks whatever Crash lands on, along with any adjacent objects.
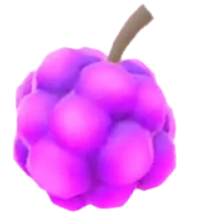
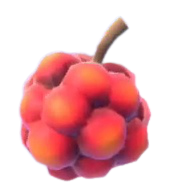
☞ During a level you may pick up berries. A berry launch is performed by tapping on the screen, which sends the berry bouncing forwards.

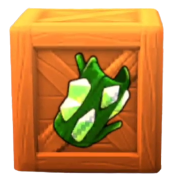
 The tutorial introduces Aku Aku. When you break a crate with his picture he appears as a floating mask beside you. The mask can absorb the damage from most hits (except falling into a pit or running into a solid wall), then it disappears.
Breaking open a second Aku Aku crate turns the mask to gold, which can now absorb two hits. Breaking a third crate surrounds Crash with an energy field for about fifteen seconds which enables him to run straight through crates and most obstacles. The mask then turns back to gold.
If Crash doesn’t have a mask when he runs into something he becomes dizzy for about seven seconds (stars spin around his head and birds sing). Another hit while dizzy is fatal.
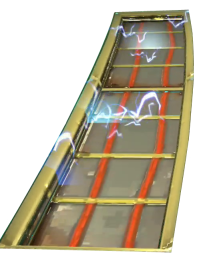
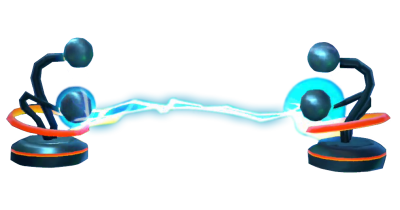
To fire a portal weapon tap the screen when the arrows are as close to the middle as possible – but don’t wait too long or it will fire automatically. You are still victorious if you do not tap near the middle, but the reward (XP and Trophies) is decreased.
You also gain a Power Gem for defeating a henchman.
Here are the locations that are currently implemented:
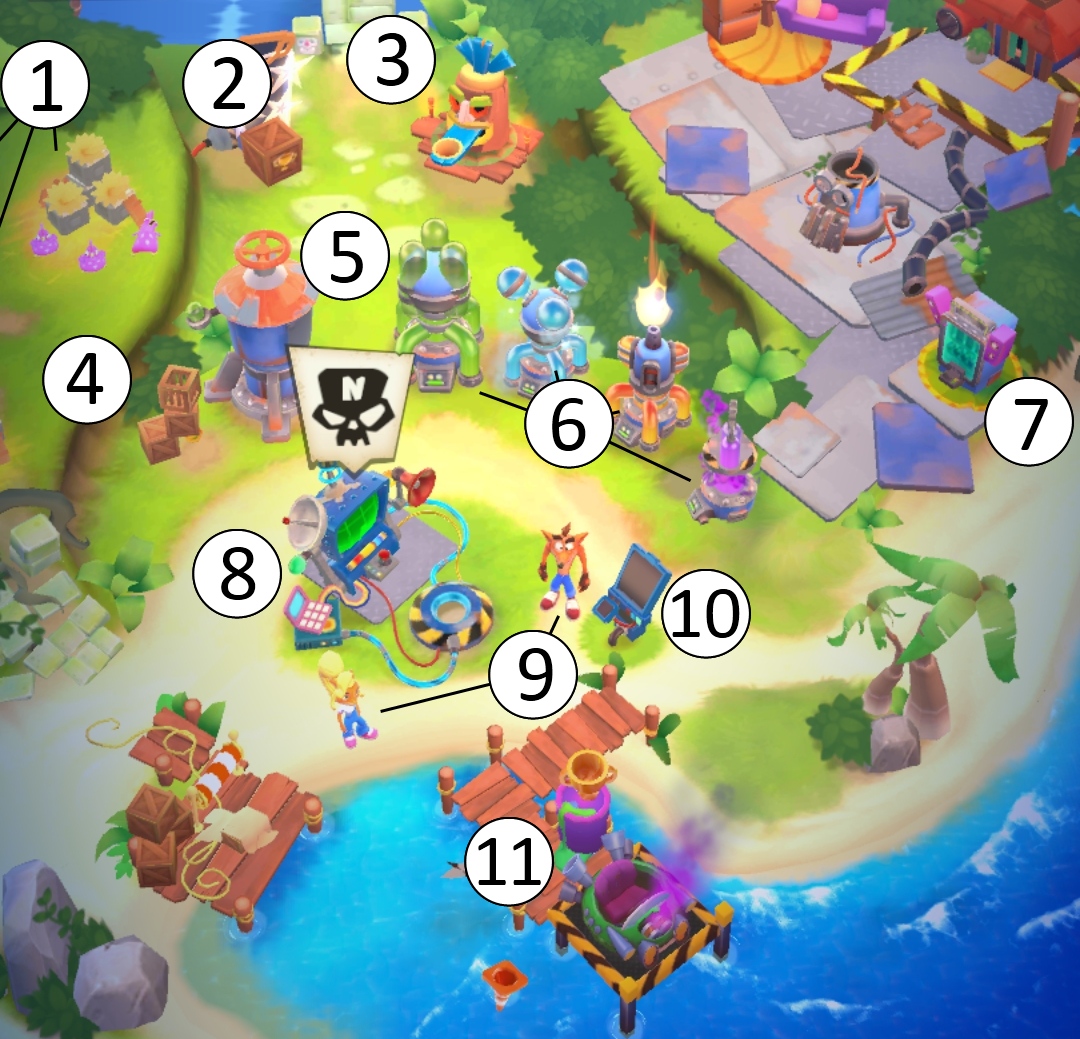
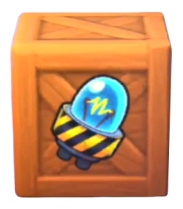
① Chicken Coops × 3 (two off screen) for producing eggs. Not initially available.
② Trophies collected.
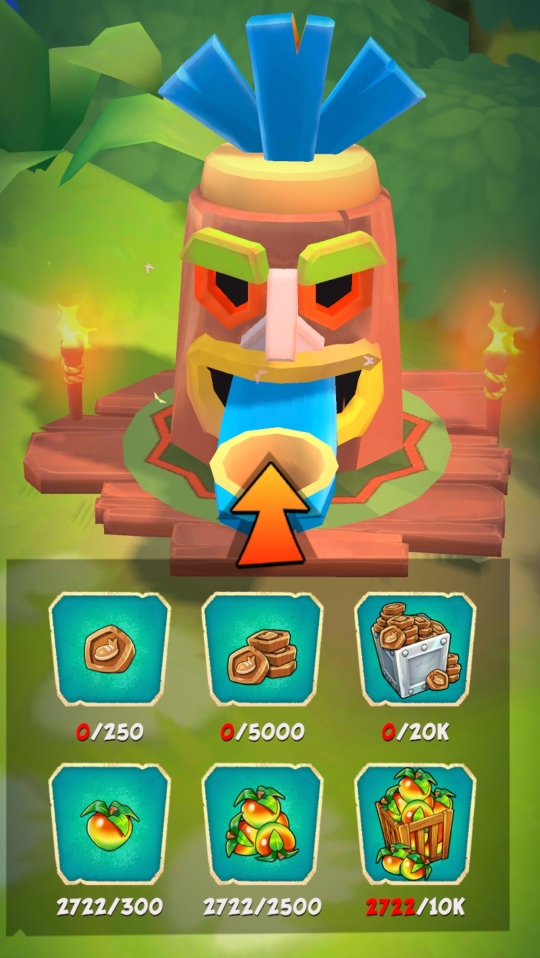
③ Tiki Head for converting Steps and Wumpa Fruit into Trophies.
④ Wumpa Fruit. No storage limit.
⑤ Silo for storing Ingredients and Parts. There is a storage limit which can be increased.
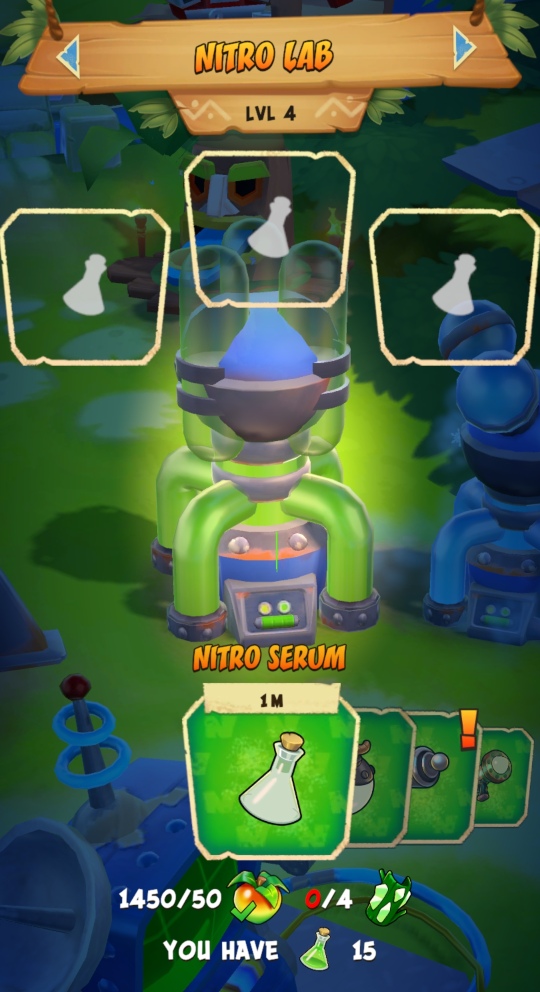
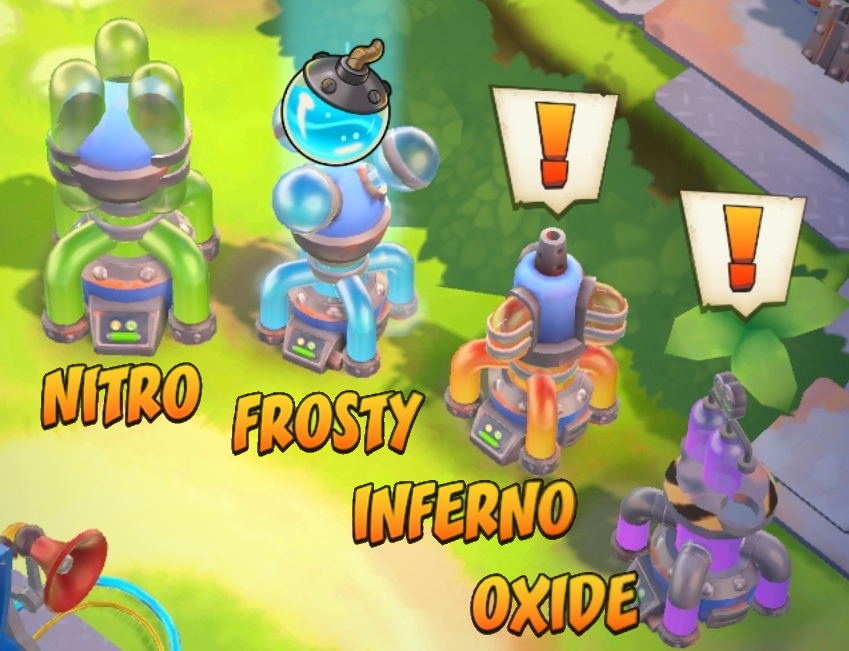
⑥ Labs × 4 for creating Portal Weapons from Ingredients. Weapons do not take any space. Only the Nitro Lab is initially available.
⑦ Vending Machine with daily deals and free items.
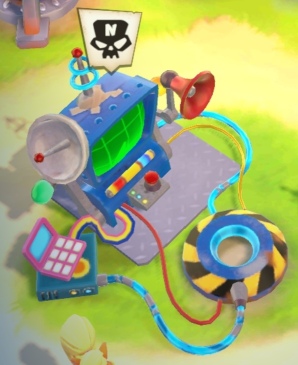
⑧ Mission Computer for Battle Runs.
⑨ Skins × 2 for Crash and Coco.
⑩ Mission Board with occasional quests.
⑪ Pass information (“Return of Nitros Oxide” is shown above).

| Teams & Challenge Runs |

| Vending Machine (same as ⑦) |

| Island map for Collection Runs |

| Level and progress towards next level. |
| Pass information (same as ⑪). |
| Special offers. |

| Mission Computer (same as ⑧). |

| Aku Aku’s Quests. |

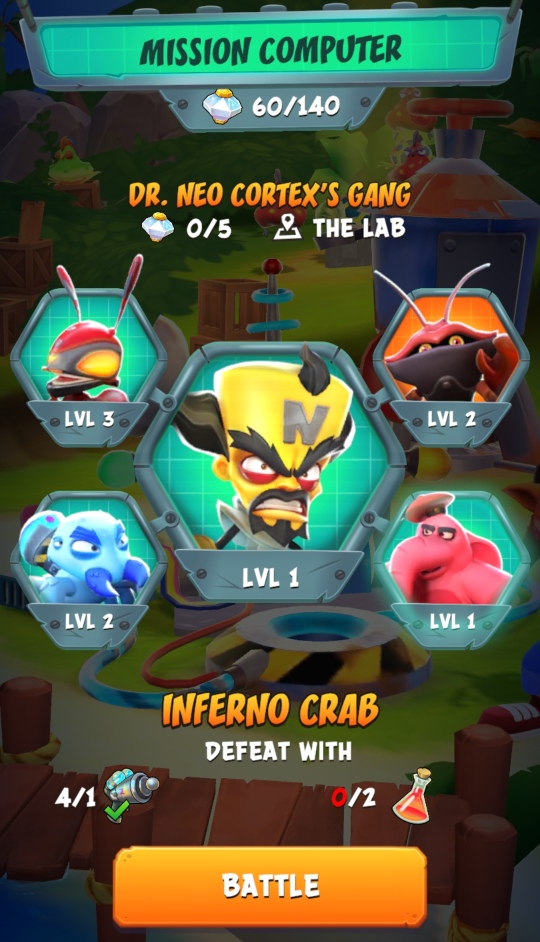
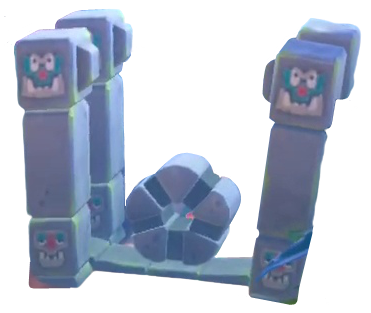
Take a look at the Mission Computer. Five henchmen are displayed, including a boss in the middle who must be fought after the other four. Tap on each henchman to see the weapons required to defeat them.
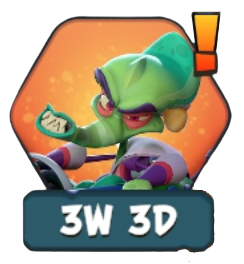
In the example below from later in the game, Frosty Araknid requires 2 frosty serums (the player has 1) and 2 frosty bombs (the player has 4).
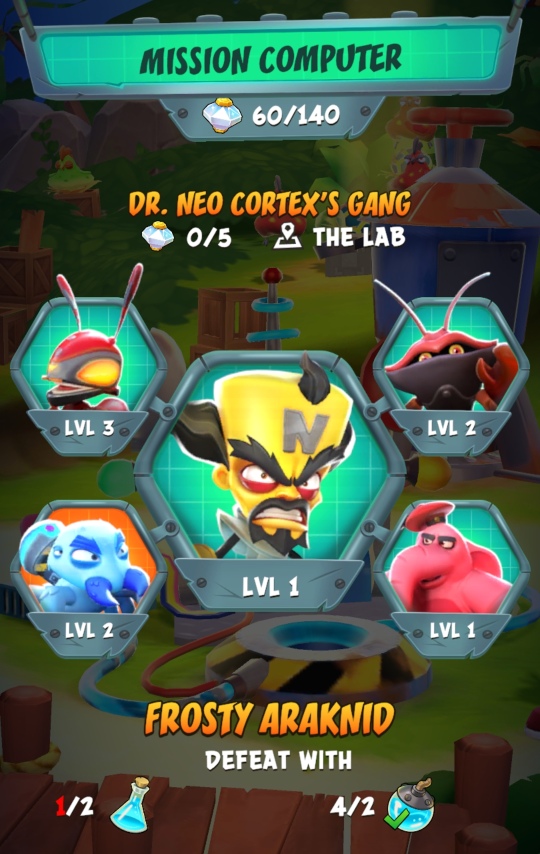
For the initial gang (Scorporilla’s Gang), all the henchmen require 1 nitro serum, except for the boss who requires 1 nitro bomb.
Go back to the main screen and tap on the Nitro Lab (the top green lab). A list of four weapons is displayed at the bottom, but initially only nitro serum is available. You can see that creating 1 nitro serum requires 50 wumpa fruit and 4 glowbark, and that it takes 1 minute (“1M”) to finish.
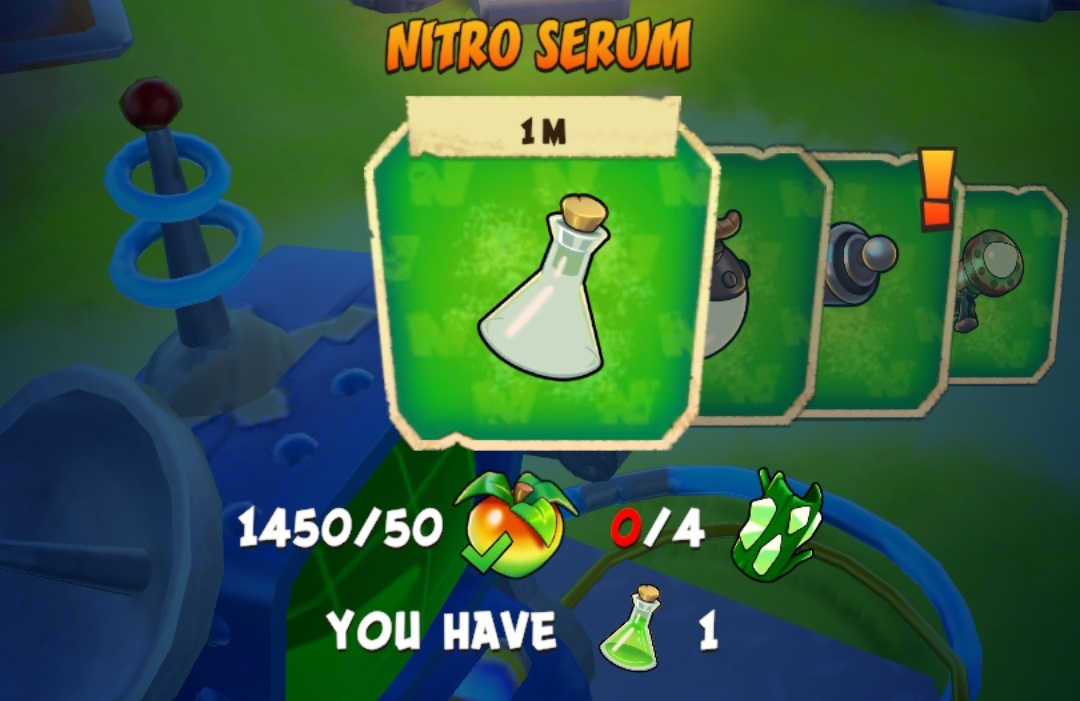
If you have the ingredients, you can create the serum by dragging the flask up to the top left slot. (You can still create it if you don’t have the ingredients, but it will cost you valuable Purple Crystals).
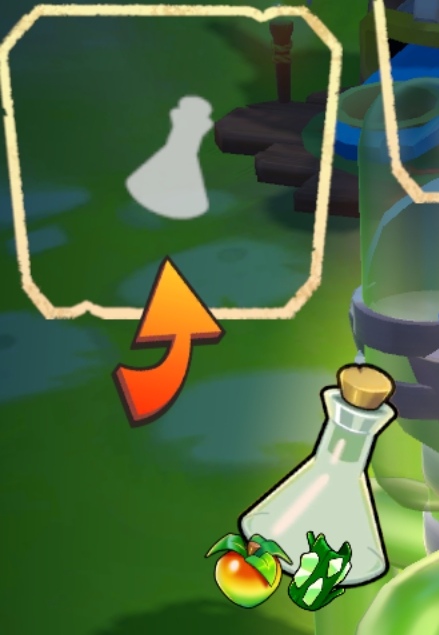
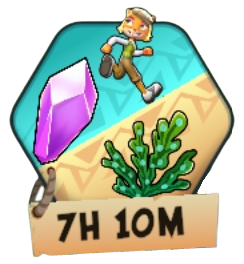
But you usually need to go and collect the ingredients first, which involves Collection Runs. Either tap on the Running Bandicoot button on the bottom right of the lab screen, or go back to the main screen and tap on the Island map button.
 ...
...
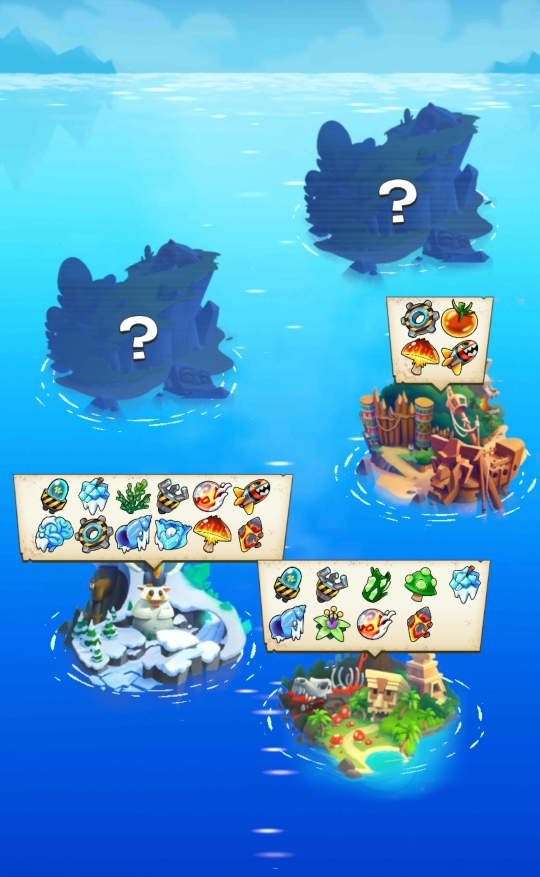
This takes you to the Island Map, which shows you the islands you have unlocked so far and the ingredients available on each one. There are four levels on each island and a new level is ulocked when you collect enough Power Gems.
Tap on a level to see the Ingredients and Parts available there (Parts are used for upgrades later in the game), then press the Run! button to begin. (The Challenges button shows a list of extra challenges for the level, which are gradually unlocked with Power Gems).
 Warning!
If you die during a collection run, the game will ask if you want to continue by either watching an ad or spending crystals. Never spend crystals! They are too valuable to use up this way. (Eventually the option to watch an ad disappears; you can still continue, but lose your accumulated Steps. See Tiki Head, Steps and Wumpa Fruit for more information).
Warning!
If you die during a collection run, the game will ask if you want to continue by either watching an ad or spending crystals. Never spend crystals! They are too valuable to use up this way. (Eventually the option to watch an ad disappears; you can still continue, but lose your accumulated Steps. See Tiki Head, Steps and Wumpa Fruit for more information).
The path in a Collection Run often splits in two, with a sign above each direction either indicating the Ingredients / Parts you may find on that path, or the “Home” symbol to finish the run and return to the home base.
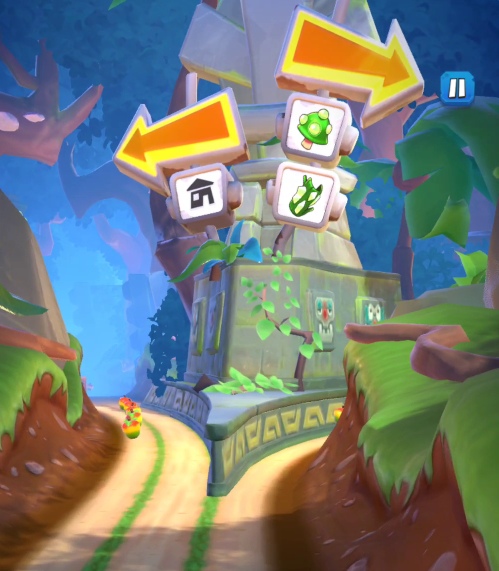
Note that the layout of a Collection Run is always the same, and that once Ingredients / Parts are collected they do not reappear if you return to the same section again.
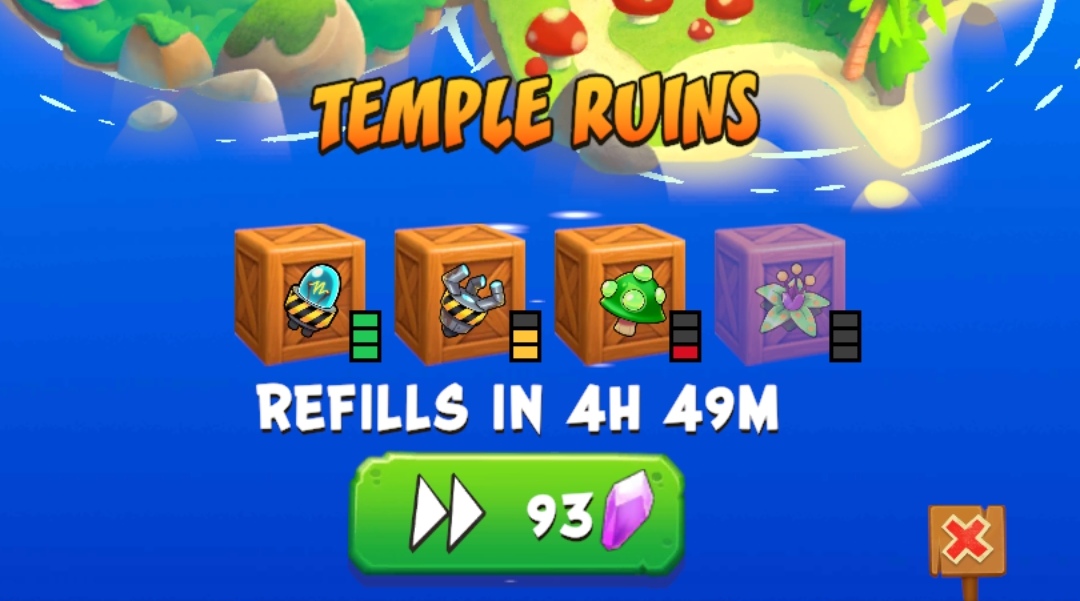
If you go back to the island map after completing a run, it displays the amount of each Ingredient / Part remaining as a bar graph: green for full, yellow for high, red for low and black for depleted. It also shows the “refill time” until they are replenished again. (You can spend Purple Crystals to instantly replenish the level, but the cost is very high considering the rarity of crystals).
Now that you’ve collected some ingredients you can go back to the Nitro Lab, create some Portal Weapons and defeat those pesky henchmen!
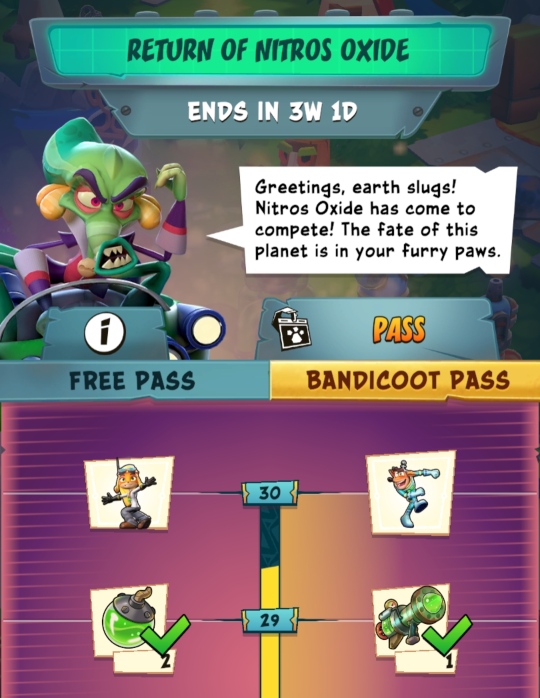
Season 1 was called “The Return of Nitros Oxide,” and ended on May 3rd 2021. It went up to 140 Power Gems and went up to level 3.2, Road to Ruin. Season 2, “Running Outta Time,” started on May 6th 2021 and went up to 175 gems, adding level 3.3 Beach Jungle. Season 3, “Battle of the Dragons,” began on June 10th 2021 and added level 3.4 Upstream.
All players’ Trophies are reset to zero a few days before a new season, and Trophies earned between that time and the start of the season do not count towards Passes. However, players do keep everything else they have acquired (including Steps and Wumpa Fruit).
In the current season (and presumably future seasons), all players are given a Free Pass and may optionally purchase a Bandicoot Pass for additional rewards. When you purchase the pass you immediately gain all of the rewards your trophies have earned.
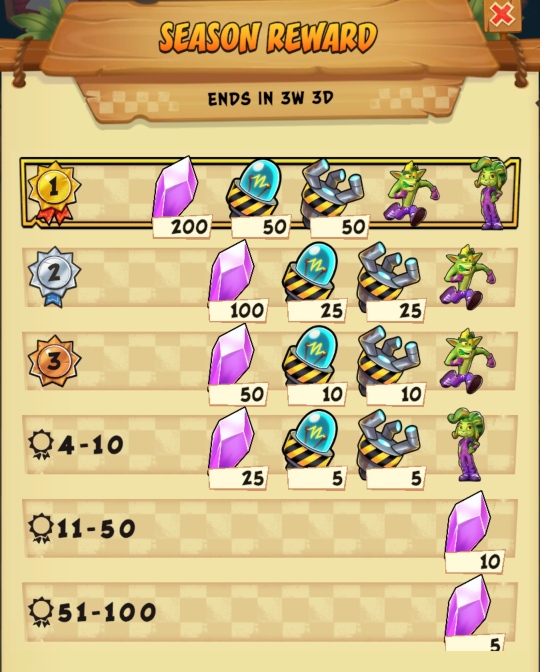
The rewards for both passes are described on a Crash Bandicoot Fandom page. Note that if you possess the Bandicoot Pass, you still gain all of the Free Pass rewards as well. There are 30 tiers (reward levels), with the 30th tier at 25000 trophies.
There is a YouTube Video evaluating whether the Bandicoot Pass is worthwhile.
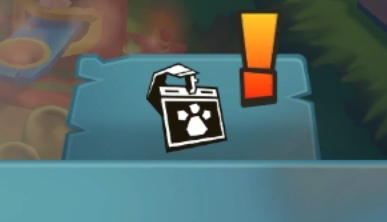 If the right hand tab shows an exclamation mark, your next reward is ready to claim.
You can view the leaderboard by pressing the Teams button on the main screen. Tap on a team name to see its members or join the team.
Tap on the second tab to search for a team name or create a new team, and the third tab to chat with your team. The “!” tab is not currently implemented. The bottom left button shows the season rewards, and the botton right button is for Survival Runs.
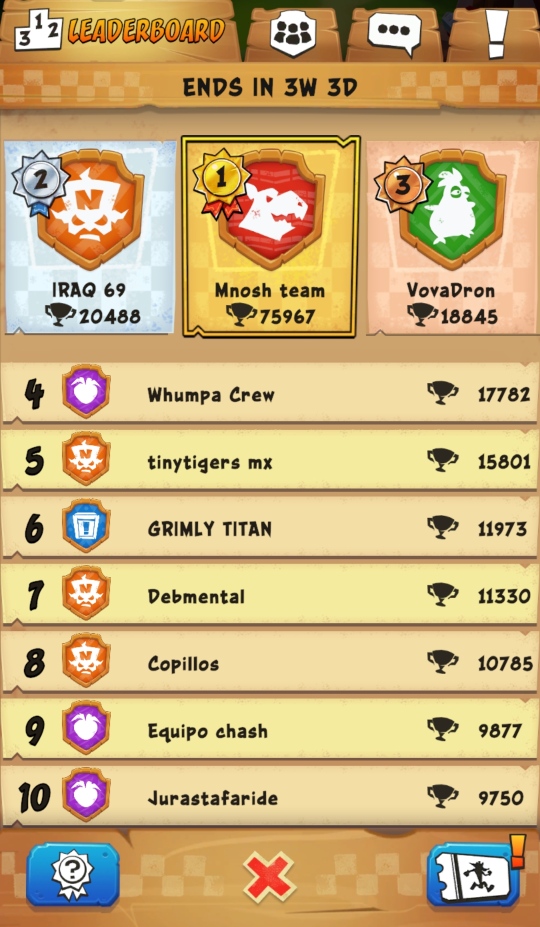 It is possible to leave a team but there is a 48 hour cool down period before you can join a new one. The trophies you collected for your old team still apply to them, but you start from zero with the new team. (But you still keep your personal trophies and they all count towards your Free Pass / Bandicoot Pass rewards).
If you are not in a team at the start of the season and join one later, all of the Trophies you have gained in the current season count towards the team.
 Purple crystals are the game’s currency. You can buy them for real money from the Vending Machine or by tapping “+” at the top right of the main screen.
Other ways to obtain crystals:
Uses for crystals:
(For the last two you can watch an ad instead of using crystals, but that option disappears after a few times).
This YouTube video has some advice on what to use crystals for and what not to. The best uses are probably unlocking Chicken Coop and Lab slots (which saves a lot of waiting time) and buying Skins with useful collection bonuses.
Avoid using crystals for things you can get for free with a little patience, such as Ingredients – unless you are short just by one or two Ingredients when crafting Portal Weapons, where spending a few crystals can save hours of waiting for a Collection Run to become available again.
Warning!
In the current version of the game, there are several places (such as dying in a Collection Run) where the game asks if you want to spend crystals to continue. There is no confirmation, so if you accidentally press the button you may lose valuable crystals.

 Skins change Crash and Coco’s appearance, and some also give a bonus when you use them: an Aku Aku mask at the start of the run, increased Trophies with certain types of henchmen or a bonus when collecting specific Ingredients. This is indicated as a percentage such as “20% more pop blossoms,” meaning that for every 5 you collect you actually gain 6.
Skins can be purchased from the Vending Machine for Purple Crystals. Only a few are available at one time. They are also given as rewards for progress in the Free Pass and Bandicoot Pass, and as end of season rewards.
At the start of a Collection Run and you can switch between Crash and Coco, and choose which skin to use for the run (or purchase a new one). Skins are displayed in order of percentage bonus for Ingredients found in the run.
At the start of a Battle Run you can also choose a skin. Some skins increase the number of Trophies you earn when you face a particular type of henchman (e.g. Nitro Neo Cortex):
 |
Nitro |  |
Frosty |  |
Inferno |  |
Oxide |
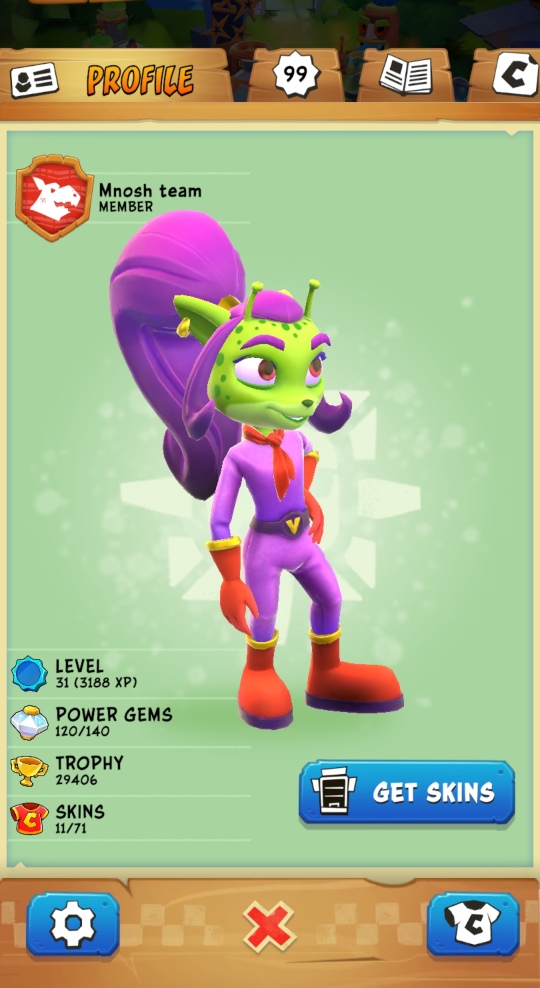
As well as using the Vending Machine, you can view or purchase skins by tapping the small Crash and Coco on the main screen, or via your profile (press the top left Level button to view your profile). Skin images may be rotated by dragging them left and right.
Fandom has a list of known skins.
 Gaining Power Gems is the main way of progressing through the game.
You earn one gem for each henchman you defeat in the game (i.e. each Battle Run).
They unlock various things in the game: access to Collection Runs, Portal Weapons, the Tiki Head, Chicken Coops and new egg types.
Gaining Power Gems is the main way of progressing through the game.
You earn one gem for each henchman you defeat in the game (i.e. each Battle Run).
They unlock various things in the game: access to Collection Runs, Portal Weapons, the Tiki Head, Chicken Coops and new egg types.
The number of gems required to access the next level varies:
|
Wumpa Island
1 Turtle Woods
|
Ice Warp Island
30 Sewer or Later
|
N. Sanity Island
100 The Great Gate
|
(Note that the coloured gems gained from Gem Challenge Runs do not count as Power Gems, and they do not currently affect the rest of the game).
 Gaining XP (Experience Points) increases your Level. The top left button on the main screen displays your current level, along with your progress towards the next one as an arc inside the circle. (Press this button to display your Profile).
XP is received from defeating henchmen, doing Survival Runs, completing Missions and as rewards for progressing in the Free Pass and Bandicoot Pass.
The XP requirement to level up increases. Going from level 1 to 2 takes 12 XP; level 9 to 10 takes 75 XP; level 29 to 30 takes 204 XP.
The reward for gaining a level is a combination of Ingredients, Parts and Purple Crystals.
The King forum has a post with the XP requirements and rewards for levels 1 to 70.

 Trophies are used to progress in the Free Pass and Bandicoot Pass (25000 trophies are required to reach tier 30 and gain all the rewards), and end of season rewards are based on the number of trophies your Team has accumulated.
The main sources of trophies are the Tiki Head (from Steps and Wumpa Fruit) and Survival Runs. The Trophy Crates found in Battle Runs contain 5 trophies each. Aku Aku’s Quests usually give 25 trophies as a reward, and Missions and defeating henchmen grant trophies too.
 The Tiki Head is found on the main screen just above the Labs, and is unlocked after gaining 11 Power Gems.
It is used to convert Steps and Wumpa Fruit gained during runs into Trophies. There are three conversion rates for each, displayed under the Tiki Head (to use, press and slide onto the arrow on the tongue):
250 Steps = 1 trophy (1 per 250)
5000 Steps = 25 trophies (1 per 200)
20000 Steps = 200 trophies (1 per 100)
300 Fruit = 1 trophy (1 per 300)
2500 Fruit = 10 trophies (1 per 250)
10000 Fruit = 50 trophies (1 per 200)
The optimal method of gaining trophies is to save up Steps and Wumpa Fruit until you have 20000 or 10000 respectively, then cash them in.
There can be a risk in saving up Steps though: if you die during a Collection or Battle Run you are usually offered a choice of watching an ad or spending Purple Crystals to keep your Steps. However, the option to watch an ad disappears after a while, forcing you to either spend precious crystals or lose steps.
For this reason it can be wise to cash in your Steps before starting a new, unfamiliar Collection or Battle Run level. (You do not lose Steps in Challenge and Survival Run levels).
 Every so often Aku Aku offers three quests for a reward of Trophies and Purple Crystals. A button with three check boxes appears at the top left of the main screen, taking you to the list of quests.
There is no particular time limit, and the quests are optional.
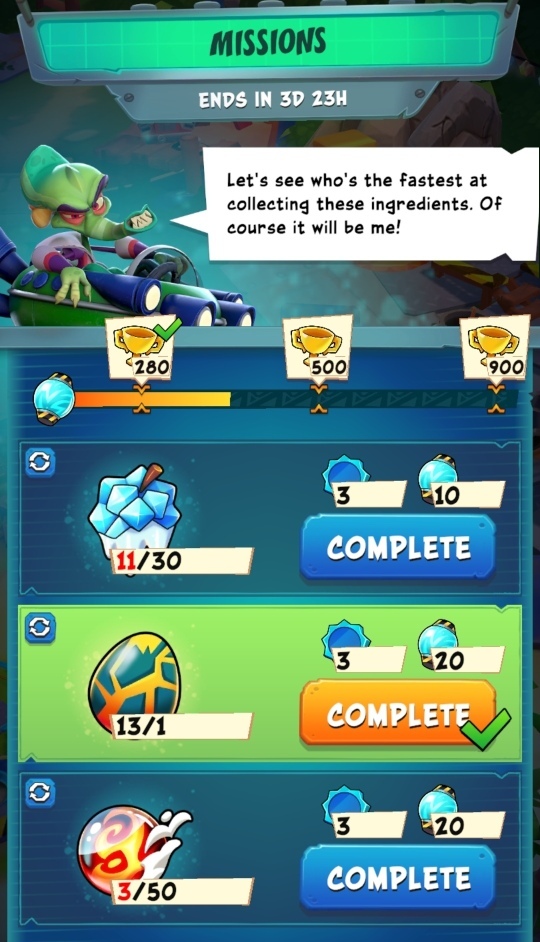
 Missions appear around once per week during Seasons. The computer to the right of Crash on the main screen lights up green; tapping it takes you to the Mission Board.
Three missions are always available. Each mission involves collecting a certain amount of one Ingredient. They must come from a Collection Run; obtaining them from a Challenge Run does not count.
Unlike Aku Aku’s quests, ingredients disappear when you complete the mission, so be careful not to choose something you really need right now!
Pressing  lets you reject a mission; a new one appears in one hour.
Each mission is worth a certain amount of Mojo (as well as a few XP). The bar above the mission list records your current total. When it reaches one of the three Trophy spots you gain the number of trophies indicated.
There is a time limit for completing missions, displayed at the top of the screen.
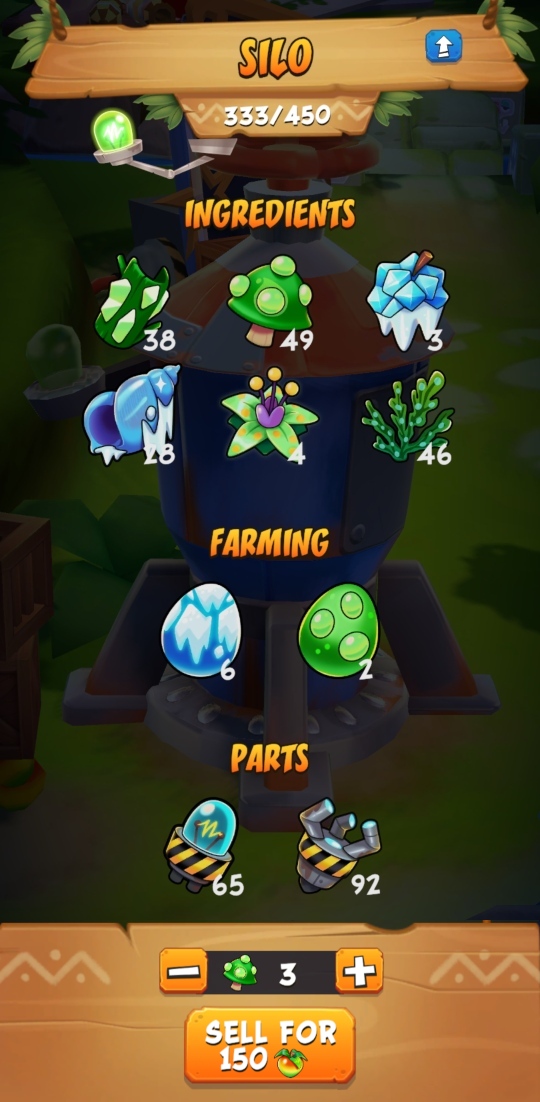
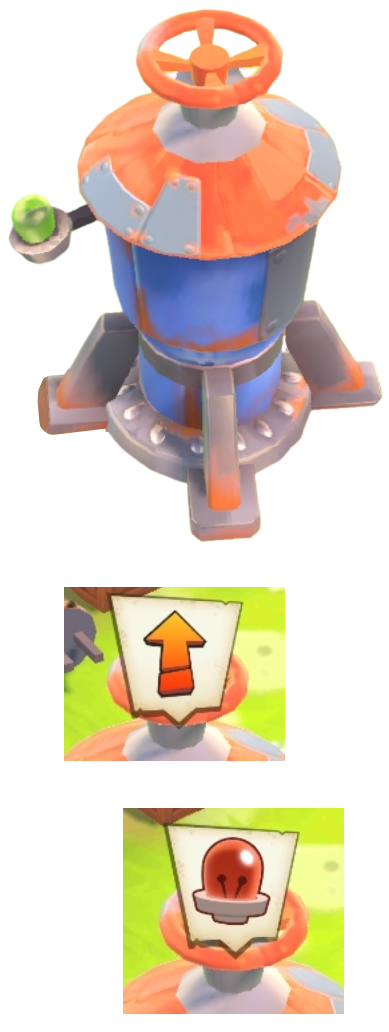 The Silo is where you keep your Ingredients, Parts and Eggs. Tap on an item to display its description (or sell it; see below).
Initially the Silo has a maximum capacity of 250 items. This can be increased by upgrading, which requires a certain number of Parts. Press the arrow button at the top right to view the requirements and do the upgrade. (When you have enough Parts, the silo image on the main screen shows an arrow above it).
In the current version of the game, the capacity may be increased up to 1200 in steps of 50. Note that the required Parts might not be available until you have unlocked a future Collection Run.
If the Silo becomes full a red siren appears above it. You must either use up some items (to create Portal Weapons or Eggs) or sell them for Wumpa Fruit to reduce down to the silo capacity. It is better to use items if at all possible rather than sell them.
Sometimes you may find yourself accumulating Ingredients or Parts you don’t need right now. If your Silo is getting full then selling them can be an indirect way to acquire more Trophies (via the Tiki Head). This means that during a Collection Run, you can think of crates with unwanted items as being worth 25 or more Wumpa Fruit each, so they are still worth collecting.
Ingredients and Parts sell for 25-100 fruit, and Eggs sell for 300-375 (atom eggs sell for 1000).
The Parts needed to upgrade the Silo to levels 1-10 and 11-20 were made available by user zviznemte on reddit.
Apart from buying them for Power Crystals or receiving them as rewards, Ingredients are obtained from Collection Runs and Challenge Runs.
In this table, Gems is the number of Power Gems required to unlock the level. Amount is how many of the Ingredient are in the level.
| Ingredient | Gems | Level (Amount) | |
|---|---|---|---|
 |
Glow Bark | 1 | 1.1 Turtle Woods (60) |
 |
Nitric Fungus | 1 15 20 |
1.1 Turtle Woods (30) 1.1 Turtle Woods Ch. Run (15) 1.3 Temple Ruins (45) |
 |
Pop Blossom | 20 26 45 |
1.3 Temple Ruins (28) 1.3 Temple Ruins Ch. Run (15) 1.4 Dino Might (42) |
 |
Wiggle Weed | 30 65 |
2.1 Sewer or Later (40) 2.1 Sewer or Later Ch. Run #1 (20) |
 |
Chill Berry | 8 30 60 |
1.2 Lost City (26) 2.1 Sewer or Later (39) 2.2 The Lab (54) |
 |
Shell Shard | 8 16 75 |
1.2 Lost City (25) 1.2 Lost City Ch. Run (10) 2.3 Snow Go (37) |
 |
Brain Freeze | 75 84 90 |
2.3 Snow Go (20) 2.3 Snow Go Ch. Run (10) 2.4 Bear It (30) |
 |
Snow Cabbage | 75 95 |
2.3 Snow Go (34) 2.1 Sewer or Later Ch. Run #2 (15) |
 |
Magma Chunk | 45 90 97 |
1.4 Dino Might (17) 2.4 Bear It (26) 2.4 Bear It Ch. Run (10) |
 |
Flame Orb | 45 55 60 |
1.4 Dino Might (32) 1.4 Dino Might Ch. Run (15) 2.2 The Lab (49) |
 |
Red Eyes | 60 70 100 |
2.2 The Lab (22) 2.2 The Lab Ch. Run (10) 3.1 The Great Gate (31) |
 |
Stinky Shroom | 90 100 120 130 |
2.4 Bear It (8) 3.1 The Great Gate (13) 3.2 Road to Ruin (19) 3.2 Road to Ruin Ch. Run (10) |
 |
Glowmato | 100 110 120 145 |
3.1 The Great Gate (20) 3.1 The Great Gate Ch. Run (10) 3.2 Road to Ruin (30) 3.3 Beach Jungle (45) |
 |
Atom Stone | 120 145 151 175 190 |
3.2 Road to Ruin (17) 3.3 Beach Jungle (26) 3.3 Beach Jungle Ch. Run (10) 3.4 Upstream (37?) 3.4 Upstream Ch. Run (15) |
 |
Fizzle Flake | 145 175 |
3.3 Beach Jungle (10) 3.4 Upstream (14) |
 |
Bellow Pepper | 175 | 3.4 Upstream (9) |
| Part | Gems | Level (Amount) | |
|---|---|---|---|
 |
Alpha Part | 1 20 30 45 |
1.1 Turtle Woods (21) 1.3 Temple Ruins (18) 2.1 Sewer or Later (40) 1.4 Dino Might (23) |
 |
Beta Part | 1 8 20 60 75 |
1.1 Turtle Woods (30) 1.2 Lost City (37) 1.3 Temple Ruins (37) 2.2 The Lab (25) 2.3 Snow Go (31) |
 |
Delta Part | 75 90 100 |
2.3 Snow Go (16) 2.4 Bear It (25) 3.1 The Great Gate (37) |
 |
Omega Part | 120 145 175 |
3.2 Road to Ruin (13) 3.3 Beach Jungle (20) 3.4 Upstream (27) |

 Chicken coops become available after 15 Power Gems.
Coops are used to produce different types of Eggs depending on which Ingredient you feed your mutagen chickens.
Chicken coops become available after 15 Power Gems.
Coops are used to produce different types of Eggs depending on which Ingredient you feed your mutagen chickens.
There are three coops, each unlocked at a different number of Power Gems: the North Coop (15 gems), West Coop (22 gems) and South Coop (60 gems).
Each coop has three nests which may be used to make eggs simultaneously. Only one nest is available at first. The other two can be unlocked using Parts (or sometimes Purple Crystals).
Tap on a coop to open its screen. To produce an egg, select it from the four at the bottom then drag it up to an empty nest. Eggs take from 20 minutes to 3 hours to produce, depending on the type. When the egg is ready to collect, it appears floating above the coop on the main screen.
Coops also have a level from 1 to 4. Higher levels allow you to produce more types of eggs in that coop. The level can be increased using Parts after a certain number of Power Gems.
The Parts needed to upgrade the North, West and South coops were made available by user zviznemte on reddit.
Egg types are listed below. Gems is the number of Power Gems required to unlock the egg.
| Gems | Egg type | Ingredient (Amount) | Time | ||
|---|---|---|---|---|---|
| 15 |  |
Snow Egg | |
Chill Berry (9) | 20 minutes |
| 21 |  |
Glowy Egg | |
Pop Blossom (8) | 40 minutes |
| 55 |  |
Cinder Egg | |
Flame Orb (6) | 1 hour |
| 120 |  |
Atom Egg | |
Atom Stone (6) | 3 hours |
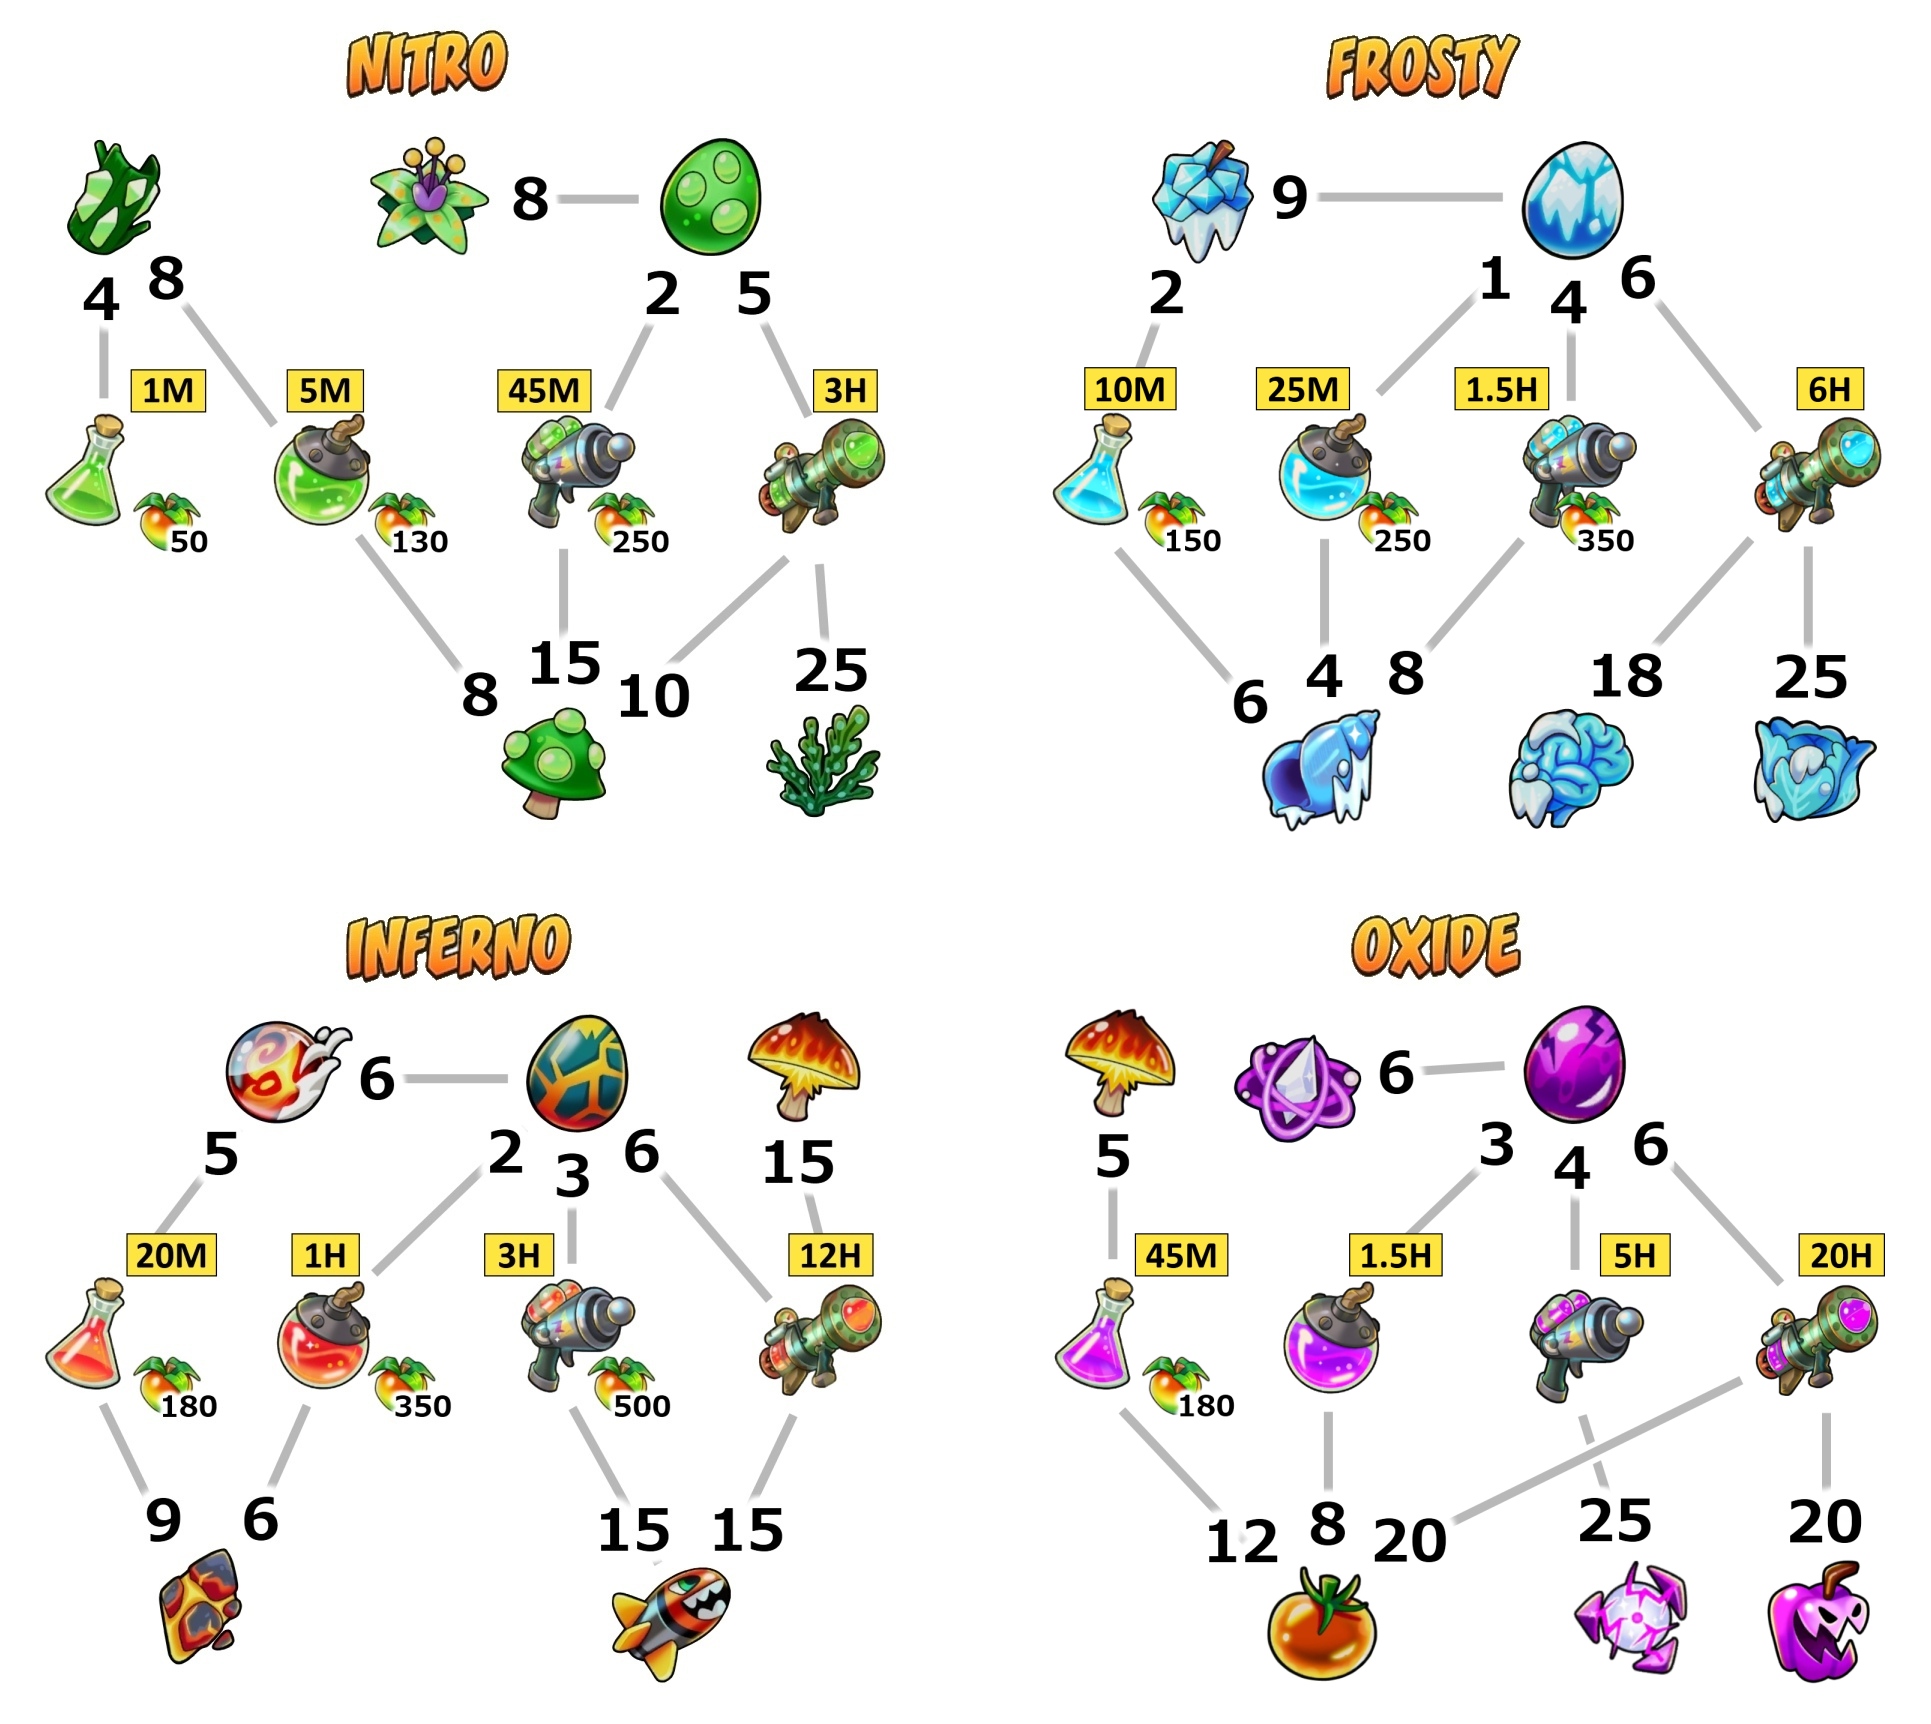
Labs are where you make Portal Weapons from Ingredients.
Initially only the Nitro lab is unlocked. The Frosty lab is unlocked at 8 Power Gems, Inferno at 45 gems and Oxide at 100 gems. These labs also need Parts to unlock.
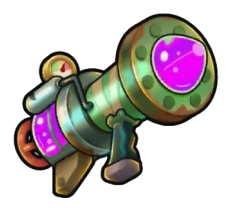
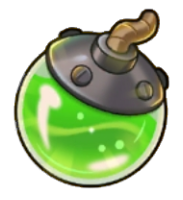
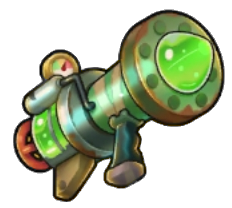
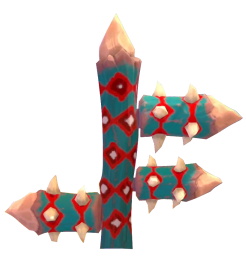
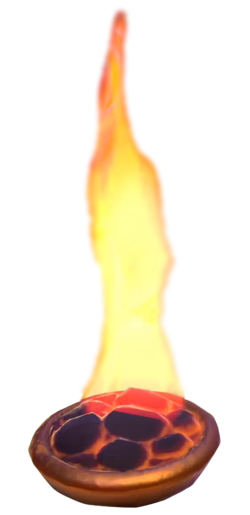
There are four kinds of Portal Weapon: serums, bombs, ray guns and bazookas. All four weapons can be created in each Lab. Nitro lab weapons are green, Frosty are blue, Inferno are red and Oxide are purple.
 |
~ |  |
~ |  |
~ |  |
Labs are used in a similar way to Chicken Coops. Each lab has 3 potential slots for making weapons. The first slot is available straight away, but the other two must be unlocked using Parts (or sometimes Purple Crystals). Labs also have a level from 1 to 4, which determines which weapons may be created there. The level is increased after a certain number of Power Gems by using Parts.
Weapons do not take up any space, so it is more efficient to turn Ingredients into weapons as soon as possible rather than to keep them in the Silo.
Fandom has a list of weapons and the number of Power Gems needed to unlock each one.
The Parts needed to upgrade the Nitro, Frosty, Inferno and Oxide labs were made available by user zviznemte on reddit.
Here are the Ingredients for each type of weapon, along with the crafting time.
 Collection Runs are the main way of obtaining Parts and Ingredients.
See Getting Started for an overview of the island map and starting a run.
The starting position in the level is random (at the location of one of the Checkpoint Crates). This was introduced in Season 3. If you do not like the starting position, you can leave the level and restart it without a penalty.
You can choose to be either Crash or Coco at the start of a run, as well as which Skin to use. These are displayed in order of percentage bonus for Ingredients found in the run (for example, a 20% bonus means you gain 6 for every 5 you collect). Certain skins give you a free Aku Aku mask as well.
There are often new techniques to master and obstacles to overcome as you advance to higher levels, but it won’t take long to get the hang of it. The tricky part can be finding all the Ingredients you are looking for in the different sections of the level.
It helps to be systematic as you explore. For example, the first time around the level you could stay “low” at or below ground level, and the second time go up “high.” Some levels require more than two circuits to completely clear; whether it is worth collecting every last Part and Ingredient is up to you.
The speed gradually increases during the level, which helps to collect things more quickly. If it becomes too fast you can always exit the level and start again.
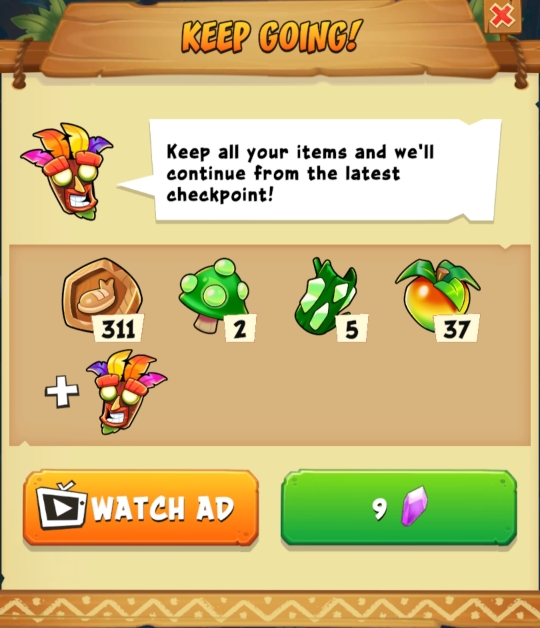
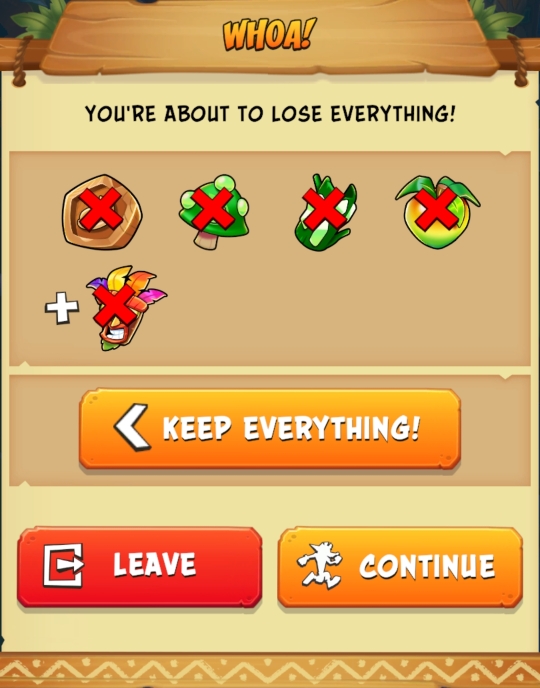
If you die in a Collection Run you return to the last checkpoint, or back to the start if you haven’t broken any Checkpoint Crates yet. To save your Steps and the Ingredients/Parts you have collected in the level, you can either watch an ad or sacrifice some Purple Crystals (which is not recommended).
After a few deaths the option to watch an ad disappears, so it can be wise to cash in your Steps at the Tiki Head before trying a new, unexplored level. Note: You may be able to get back the option to watch an ad by closing the “Keep Going” window (using the X at the top right) then pressing the “Keep Everything” button, several times in a row.
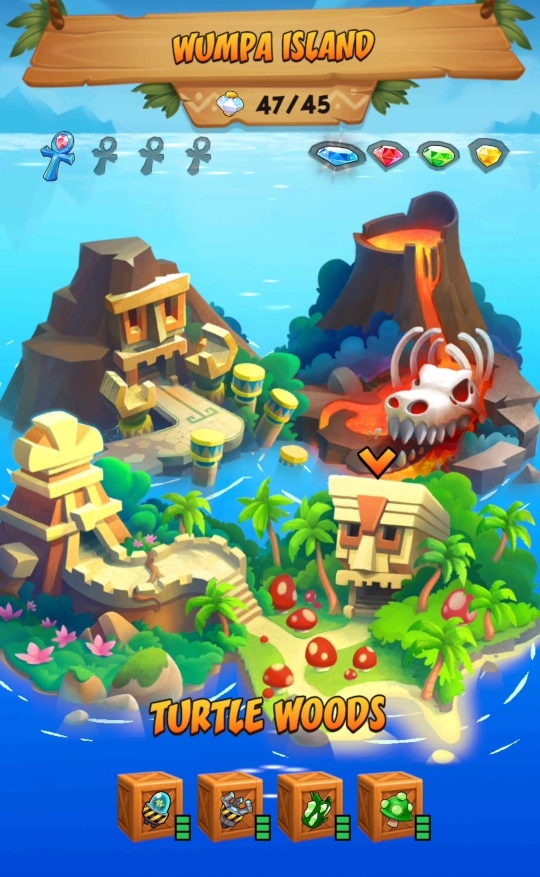
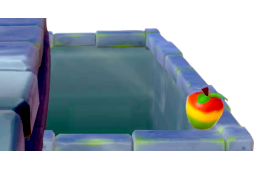
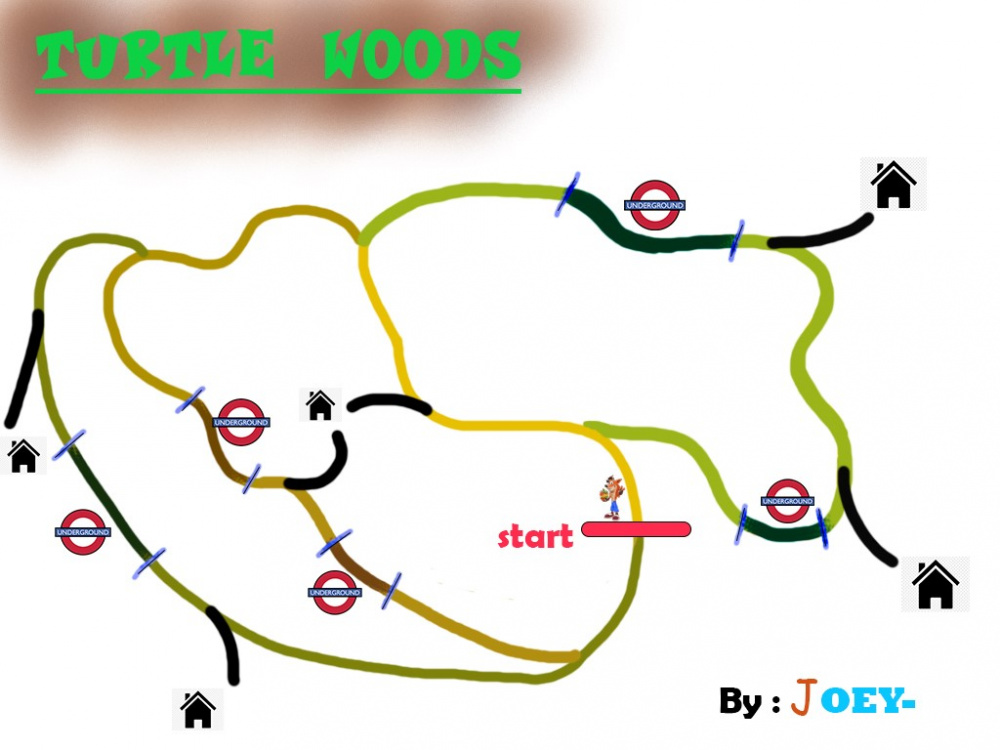
Here is a summary of each Collection Run level. Gems is the number of Power Gems needed to unlock the level. Refill is the time before all the Parts and Ingredients reappear. (Note that several items in Turtle Woods are on ending paths, so it is not possible to collect all of them in one run).
| Level (Gems) | Refill | Contents |
|---|---|---|
| 1.1 Turtle Woods (1) | 2H |
60
30
21
30
|
| 1.2 Lost City (8) | 3H |
26
25
37
|
| 1.3 Temple Ruins (20) | 5H |
45
28
18
37
|
| 1.4 Dino Might (45) | 6H |
42
32
17
23
|
| 2.1 Sewer or Later (30) | 3H |
39
40
40
|
| 2.2 The Lab (60) | 3H |
54
49
22
25
|
| 2.3 Snow Go (75) | 5H |
37
20
34
31
16
|
| 2.4 Bear It (90) | 6H |
30
26
8
25
|
| 3.1 The Great Gate (100) | 3H |
31
13
20
37
|
| 3.2 Road to Ruin (120) | 5H |
19
30
17
13
|
| 3.3 Beach Jungle (145) | 5H |
45
26
10
20
|
| 3.4 Upstream (175) | 5.5H |
37?
14
9
27
|
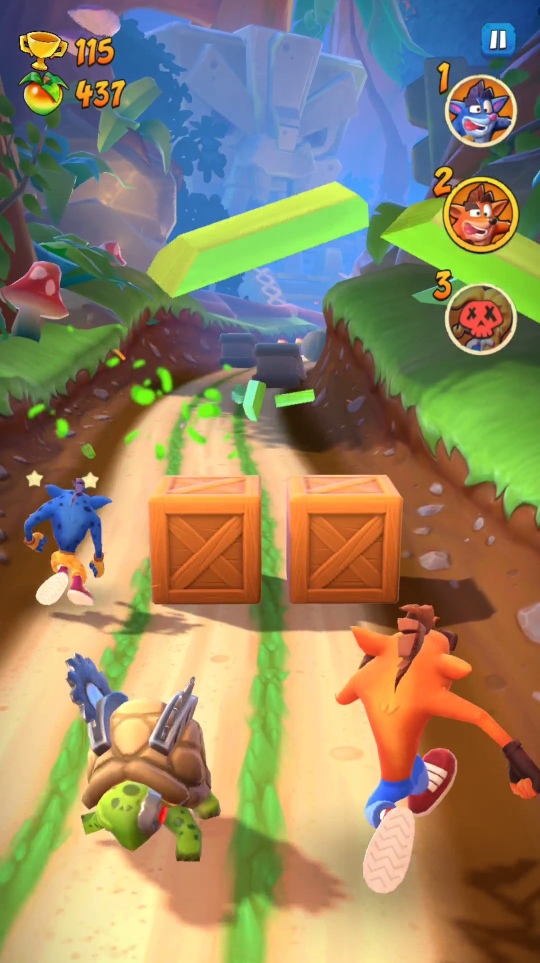
 Battle runs enable you to gain Power Gems by defeating henchmen. Players generally find battle runs to have low difficulty, though they do get harder.
Battle run levels are in a similar environment to Collection Runs, but with a different layout – the path does not split. They usually contain several Trophy Crates which are worth five Trophies each.
Tap on the Mission Computer on the main screen to see the available battle runs. There are five henchmen in each gang who you can defeat in any order, except that the central boss must come last. Tap on the henchmen to see the Portal Weapons required to defeat them.
Death is similar to Collection Runs: you can potentially lose all of your Steps unless you watch an ad or pay some crystals, and the option to watch an ad isn’t always available. For this reason it can be wise to cash in your Steps before starting a Battle Run.
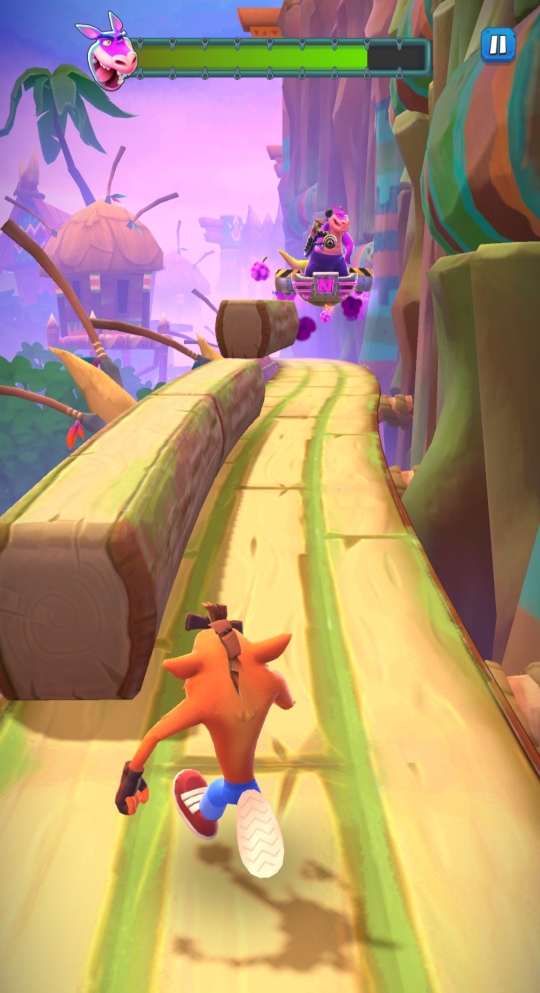 At the end of the level there is a final section where you must survive the henchman’s attacks before defeating them.
As you advance through the game, you will come across the same kinds of henchmen multiple times and get to know their attacks.
At the end of the level there is a final section where you must survive the henchman’s attacks before defeating them.
As you advance through the game, you will come across the same kinds of henchmen multiple times and get to know their attacks.
For boss henchmen, you must also reduce their health to zero by launching berries at them. Some bosses can dodge or deflect your berries, or even regenerate health.
Once you reach the end of the level you will fire one or more weapons at the henchman as described under Firing Portal Weapons above.
Fandom has a list of gangs and the weapons required to defeat them. It can be useful to look ahead to see which weapons will be needed for the next gang, especially after reaching 100 or more Power Gems (since some weapons take a long time to make).
The grand totals for all Portal Weapons required for the first 140 Power Gems are:
Battle Run Totals
| Wpn. | Total | Wpn. | Total | Wpn. | Total | Wpn. | Total |
|---|---|---|---|---|---|---|---|
|
| 114 | 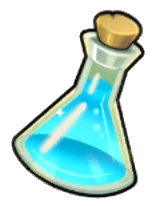
| 84 | 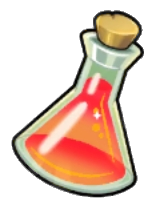
| 55 | 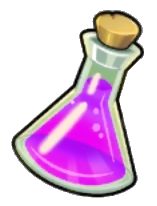
| 111 |
| 106 |
| 129 | 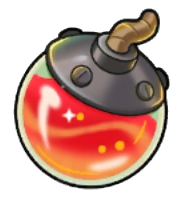
| 93 | 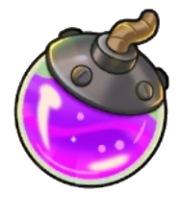
| 37 |

| 48 | 
| 75 |
| 41 | 
| 0 |
| 51 | 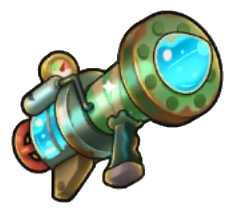
| 49 | 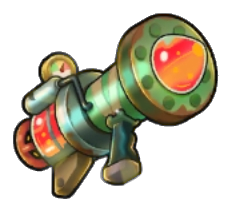
| 32 |
| 0 |
... which require the following total Eggs and Ingredients:
| Egg | Total | Ing. | Total | Ing. | Total | Ing. | Total | Ing. | Total |
|---|---|---|---|---|---|---|---|---|---|
|
351 | |
1304 | |
2078 | |
2808 | |
1275 |
|
723 | |
6675 | |
1620 | |
882 | |
1225 |
|
501 | |
1053 | |
3281 | |
1095 | |
1035 |
|
111 | |
1628 | |
666 | |
0 | |
0 |
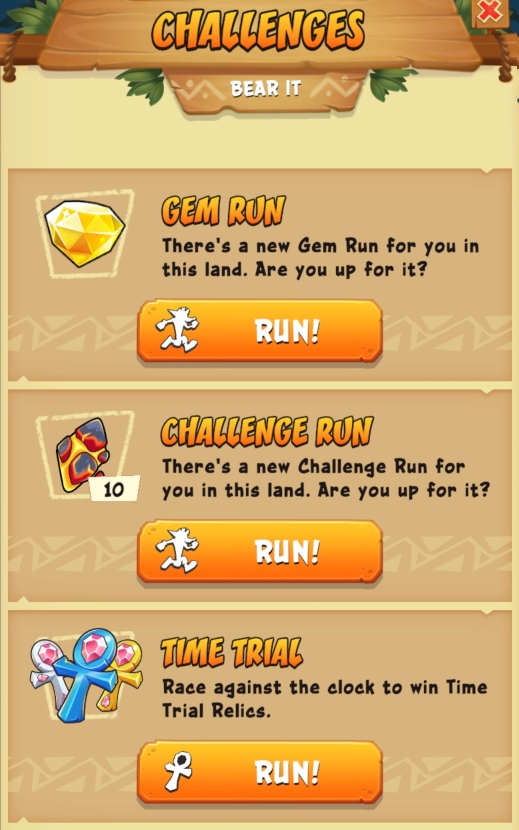
 Press the Challenges button below a Collection Run map to see some optional challenges. These require a certain number of Power Gems to unlock. After completing a challenge it becomes unavailable for 24 hours.
Gem Runs require you to get to the end without dying. For some levels you must also break all the Crates, including TNT and Nitro.
The reward for completing a Gem Run is a coloured gem (which does not count as a Power Gem). These currently have no special purpose in the game. After a Gem Run has been completed once, the reward becomes two Power Crystals instead of a gem.
Challenge Runs have various objectives: get to the end, break all the Crates and kill all the Spiders. The reward is 10-20 of an Ingredient, which can be useful when they are in short supply. See Ingredient Locations for a complete list.
 Time Trials are a race to the finish. These levels contain Time Crates that pause the timer for 1-3 seconds and Turbo Pads for a brief boost. The reward for beating the time limit is a Relic, which come in Sapphire, Gold and Platinum. Relics do not currently affect the rest of the game.
There are some useful tips for time trials on the King forum from user W35Gamer.
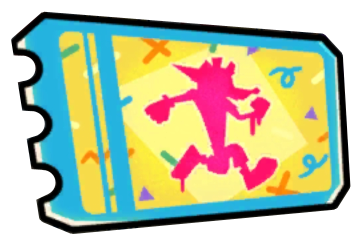 Survival Runs are only active during Seasons. They allow you to compete against two other runners (currently bots) on a randomly generated level. Each run costs a Ticket, which can be bought for Purple Crystals. Players also receive free Tickets each day.
The speed gradually increases during the run. After a random amount of time (1-10 minutes) the bots crash, leaving you as the winner. It is possible to make them crash earlier using berries to explode TNT or Nitro Crates near them. The position of the other two runners is irrelevant; outlasting them is all that matters.
If you die during a run, you can continue by either watching an ad or spending Purple Crystals (which is not recommended). You are allowed three “Continues” before the race ends.
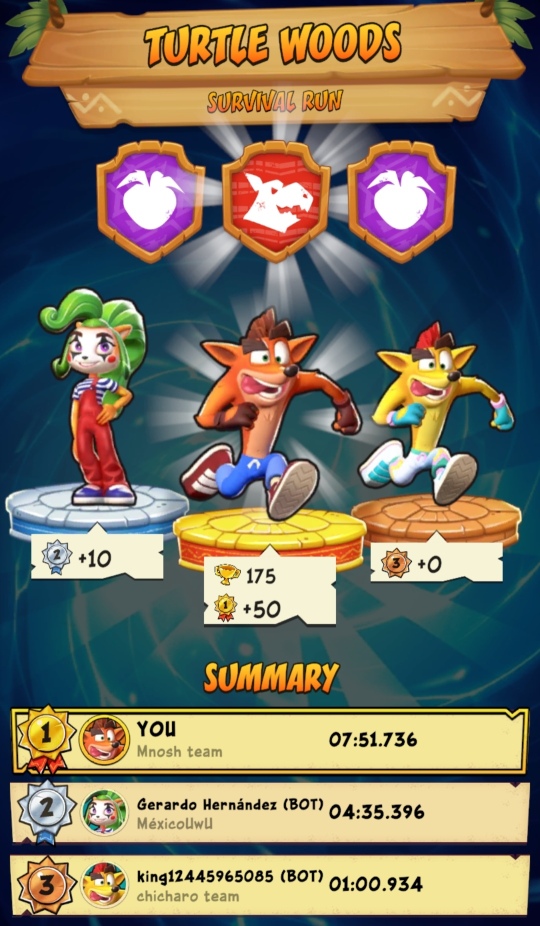
 The reward is a number of Trophies proportional to the distance you have run, plus 50 for winning or 10 for coming second.
You also gain XP equal to one tenth of the Trophies (maximum 20) along with any Wumpa Fruit you have collected.
|
60
30
21
30
|
~ 2 hours to refill |
This is a straightforward, quite long level. Some underground entrances are slightly hidden. It is not possible to obtain every Ingredient and Part in a single run since some of them are on ending paths.
Turtle Woods Map and Analysis by Joey_YouTube on the King Forum.
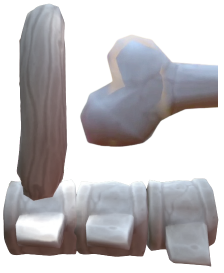
The following game objects are introduced:
| Wumpa Fruit. |
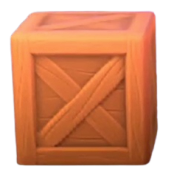
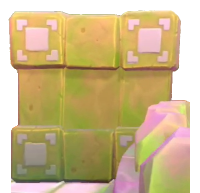
| Fruit Crate containing four Wumpa Fruit. |
| Ingredients Crate containing one Ingredient. |
| Parts Crate containing one Part. |
| Aku Aku Crate. |

| Checkpoint Crate. Restart point after dying. |

| Mushroom Jump. Propels you up and forwards when you touch it. |
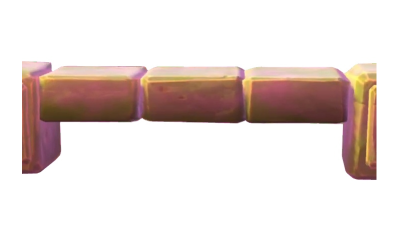
| Stone Block. |
| Underground Entrance. |
| Rolling Stone. |
| Exit Portal. |
In the Turtle Woods Gem Run:
| Boulder. Large ones take up two lanes. |
| Berry. Can be launched to destroy objects. Passes through ordinary Crates; explodes TNT and Nitro Crates. Bounces back from walls. Collects Wumpa Fruit. Only one Berry can be carried at a time. |
In the Turtle Woods Challenge Run:
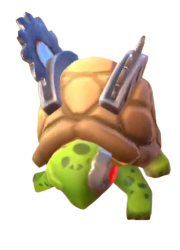
| Turtle. Spin into other objects. |
|
26
25
37
|
~ 3 hours to refill |
Adds switches and buttons. It is possible to obtain all but one of the Chill Berries in two laps.
Lost City Map and Analysis by Joey_YouTube on the King Forum.
New game objects are:
| Plain Crate. |

| Switch Crate to make transparent objects solid. |
|
| Transparent Object made solid by a Switch Crate. |
| Blue Button to activate something nearby. |
| Moving Wall activated by a Blue Button. |

| Moving Platform activated by a Blue Button. |
| Low Bridge. Slide under or jump over. |
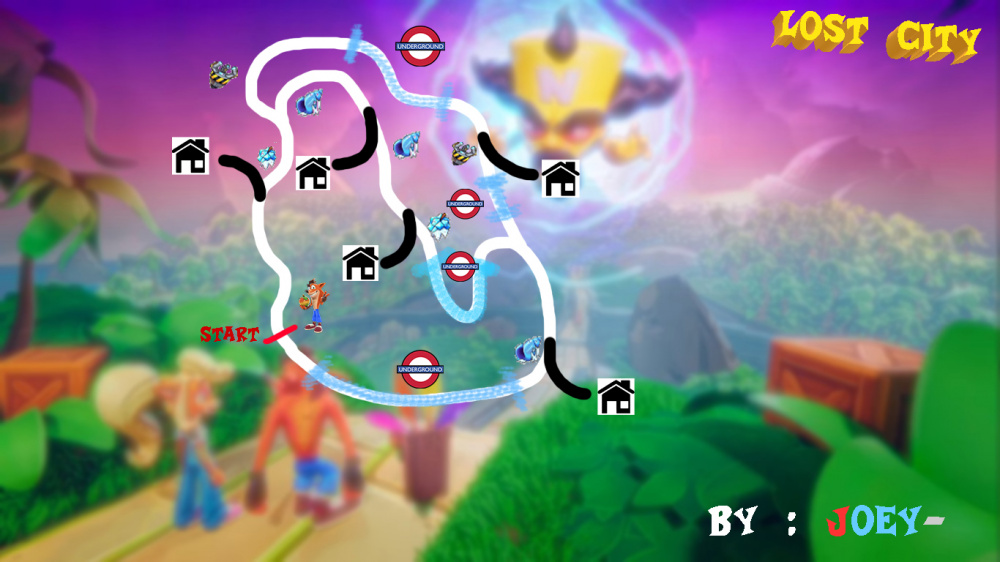
|
45
28
18
37
|
~ 5 hours to refill |
Introduces (easily avoided) Spear Traps and the mysterious Dragon Trains. Two laps will get you all of the Pop Blossoms.
Temple Ruins Map and Analysis by Joey_YouTube on the King Forum.
New game objects:
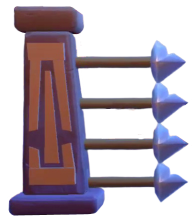
| Spear Trap. |

| Dragon Train. |

| Covered Entrance, opened using a Blue Button. |
In the Temple Ruins Gem Run:
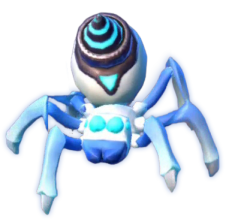
| Crawling Spider. |
|
42
32
17
23
|
~ 6 hours to refill |
This level is not unlocked until after level 2.1, Sewer or Later.
Falling bones and steaming geysers! It can sometimes be hard to see around the corners, so beware of oncoming Dragon Trains. Spin the Turtles into TNT and Nitro Crates.
There are fewer useful items underground than usual. All of the Magma Chunks can be collected in a single loop.
Dino Might Map and Analysis by Joey_YouTube on the King Forum.
New game objects:

| Nitro Switch Crate. Explodes nearby Nitro Crates. |
| (Falling) Bones. Jump over or slide under the leg bones. |

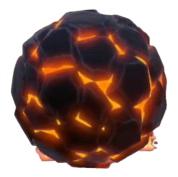
| Lava Pit. |
| Burning Boulder, taking up one or two lanes. Can be jumped over. |

| Erupting Geyser. Avoid the jet of steam. |

| Underground Entrance to a lava tunnel. |

| Hanging Spider. Cannot spin. |
|
39
40
40
|
~ 3 hours to refill |
This level is unlocked before 1.4 Dino Might, and introduces TNT and Nitro Crates. You also meet the mechanical Scrubbers who produce a shockwave when you spin them.
The Chill Berries are in three underground sections. The first two can be collected in one loop (with some difficulty for the second one), but the third set requires a second loop to get them all.
There seems to be a glitch that makes it impossible to collect all of the Alpha Parts without dying.
Sewer or Later Map and Analysis by Joey_YouTube on the King Forum.
New game objects:
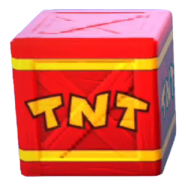
| TNT Crate. Explodes soon after being touched. Safe to step on. Do not spin! |
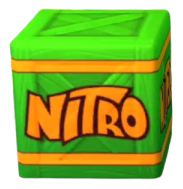
| Nitro Crate. Explodes on contact. |
| Electrified Floor. Not even Aku Aku can protect you. |
| Rolling Barrel. |
| Sideways Rolling Barrel. Can be stepped on. |

| Scrubber. Spin to send a shockwave that destroys objects, and also turns Electrified Floors on or off and has a chain reaction with other Scrubbers. |
|
54
49
22
25
|
~ 3 hours to refill |
The lair of Dr Neo Cortex! Some areas have many levels, so it isn’t possible to collect everything in just two loops. You can bounce off the slimy Blobs, but you only really need to do this in the Challenge Runs. Launch Berries to reach buttons remotely.
The Lab Map and Analysis by Joey_YouTube on the King Forum.
New game objects:
| Bottomless Pit. Not to be confused with an Underground Entrance. |
| Zapper. |

| Laser. |
| Yellow Button. Turns Lasers on or off. |

| Blob. Damages you if you spin it. Acts as a jump. |
|
37
20
34
31
16
|
~ 5 hours to refill |
Falling icicles and stomping mashers! And finally the Delta Part (“gear”) you’ve been waiting to upgrade your Silo with. All three Ingredients are found above, below and on the ground. In the Parts sections spin the penguins into TNT Crates, but avoid while they are still rotating.
New game objects:

| Falling Ice. Breakable but will give you damage. |

| Mashers. |
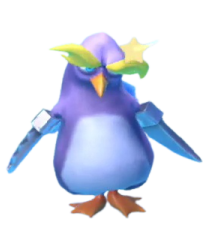
| Spinning Penguins. Can be spun into other objects. |
|
30
26
8
25
|
~ 6 hours to refill |
Introduces Fire Berries, which instantly melt frozen walls, floors and crates. The rare Stinky Shrooms are scattered throughout the level. There are Magma Chunks on the surface but plenty underground too (melt the frozen ground).
New game objects:

| Snowball. |
| Frozen Crate. Spinning causes damage. Melt with a Fire Berry. |

| Ice Wall. Melt with a Fire Berry. |
| Ice Floor. Melt with a Fire Berry. |
| Fire Berry. Melts frozen objects. |


| Seal. Acts as a jump. Can spin the ones moving sideways, but damages you to spin the ones moving towards you. |
|
31
13
20
37
|
~ 3 hours to refill |
Lots of jumping using Jump Crates; some quick reactions needed to avoid Spiked Poles. The Ingredients are straightforward to find. Berries are coloured purple but act as normal.
New game objects:

| Jump Crate. |
| Spiked Poles. Some move up and down or rotate. |
| Breakable Wall. |

| Breakable Floor. Break with a body slam. |
| Fire Pit. Safe to step on when there is no flame. |

| Spitter Plant. Spits two globs. |
|
19
30
17
13
|
~ 5 hours to refill |
A straightforward level with appearing and disappearing walls. Collecting all of the Atom Stones takes two laps, and you can find ten of the Omega Parts in a single lap.
New game objects:
| Vanishing Wall. |
| Collapsing Floor. |

| Fire Breathing Statue. |

| Mummy. Berries bounce off mummies, disabling them briefly. |
|
45
26
10
20
|
~ 5 hours to refill |
This level includes Spitter Plants that can spit more than just twice; thrown Berries rebound from their green globs. Some of the Switch Crates cause Berries or Mushroom Jumps to appear.
Nine of the ten Fizzle Flakes can be obtained in two loops (or all ten with some difficulty). Their locations are on the King forum.
There are no new object types in this level.
|
37?
14
9
27
|
~ 5.5 hours to refill |
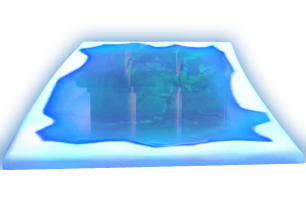
Watch for Flying Fish lurking in the river beside the track. This is the first level where Bellow Peppers may be obtained.
New game objects:

| Tilting log. These tilt forwards as well as backwards, so either jump or change lanes before reaching the end of the log. |

| Lily pad. Time your jump correctly or risk overshooting. |
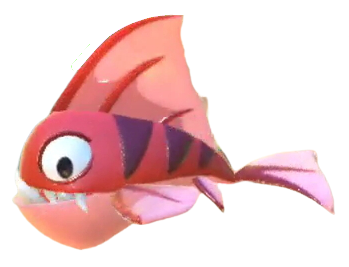
| Flying fish. These rise from the water beside the track. Spin or use a Berry to deflect. |

| Trophy Crate. Worth five Trophies. |

| Time Crate. Pauses the timer for the indicated number of seconds. |

| Turbo Pad. Speeds you up briefly. |